Steps
to Access the VPN at GTCC
We understand some of you are having issues accessing
the portal if you are using the Chrome browser. We are aware of the issue and
are working to resolve as soon as possible. Please use Internet Explorer or
Firefox if possible. We will advise once we have resolved he issue.
All, please find below a reminder of the resources
and information available to you as you work
remote. Please remember, you do NOT need VPN to
access the following sites:
·
Moodle
·
SSP
If you need to
access other resources such as I drive or Colleague/DataTel
UI, you will need to submit a request for VPN to the ITS Service Desk.
1.
If you do not have a GTCC provided laptop please make
sure to leave your work computer powered on before you leave campus.
2.
Make a note of your computer name.
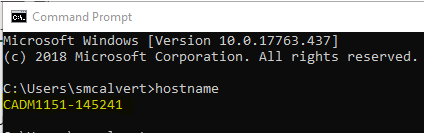
To find the computer name on your GTCC desktop computer:
![]()
Click in the Search field in the lower left corner of your screen.
Enter command and click Command Prompt.
Next to your username, enter hostname and click Enter.
Your PC’s computer name is displayed.
3.
Submit a VPN Access Request on the Portal. Click on ITS VPN User
Agreement to access the request form. The form will be
prepopulated with your connection information.
4.
Your Manager and Vice President will need to approve
your request.
5.
ITS will create your VPN access.
6.
If you are using your personal computer or if your
GTCC computer doesn’t have the VPN agent, please download VPN from the Portal.
(These instructions are provided for you on the
Portal.)
Important
Notes:
·
If you are using your personal computer to work remotely,
do not save files to your local hard drive. Instead, save your work to One
Drive.
·
If you are using your personal computer to work
remotely, be sure to check your audio/video settings as well as your camera,
microphone, and/or headset if you plan to conduct audio or video conferencing
in Microsoft Teams.
·
Do not go to any websites when working remotely that
you would not visit when working on campus.
·
If you are going to connect to VPN using your
personal computer, you will have to remote desktop into your office computer to
be able to work.
·
Be sure to log off of the VPN when you have completed
each working session, and do not leave it connected.
Connecting to
VPN Step by Step
1.
After downloading and installing the VPN agent, you
will have the AnyConnect icon in your system tray

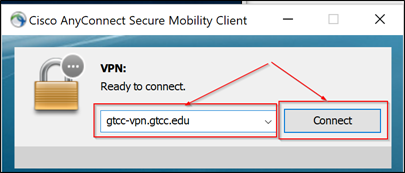
2.
The Cisco AnyConnect agent will open up. Make sure
the text box is populated with gtcc-vpn.gtcc.edu, then
click Connect.
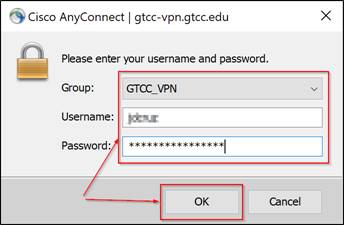
3.
The authentication window will pop up. Make sure the
Group is: GTCC_VPN, then enter your GTCC user name and password and
click OK.
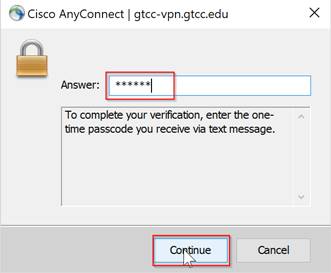
4.
You will receive a code via text message to the phone
number you provided. Enter the code in the Answer section on the new
dialog that opened, and click Continue.
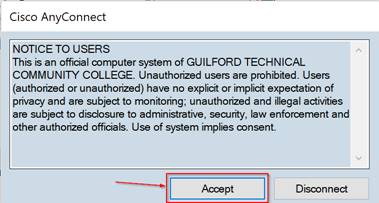
5.
At the NOTICE TO USERS screen, click Accept.
6.
The VPN Agent will go through the process of
assessing if you are using a GTCC device or a personal computer, then you will
be connected to GTCC VPN. You can confirm if the connection worked by looking
at the AnyConnect icon in the system tray. If it has a lock, it means you are
connected to VPN.

7.
If you are using a GTCC computer, you now have access
to all GTCC resources. If you are using your personal device, you need to follow
the next steps to remote desktop into your office computer.
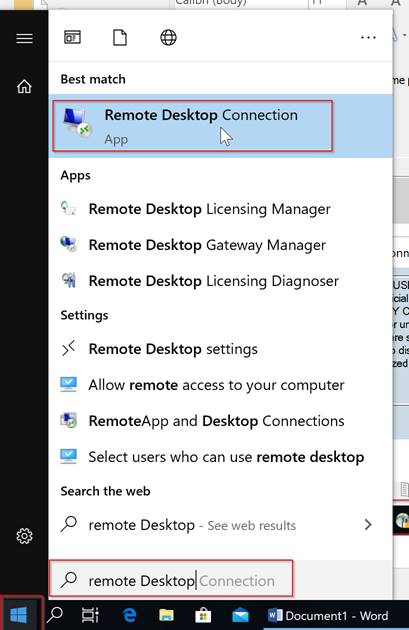
8.
Click on Start or the Search icon, type
Remote Desktop and click on the Remote Desktop Connection App to
open it.
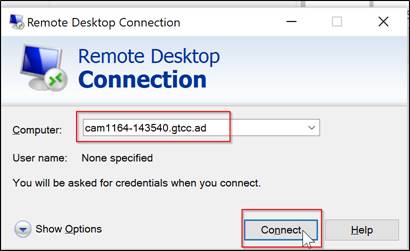
9.
The Remote Desktop Connection dialog is displayed.
Enter you computer name and append .gtcc.ad
at the end. Click on Connect.
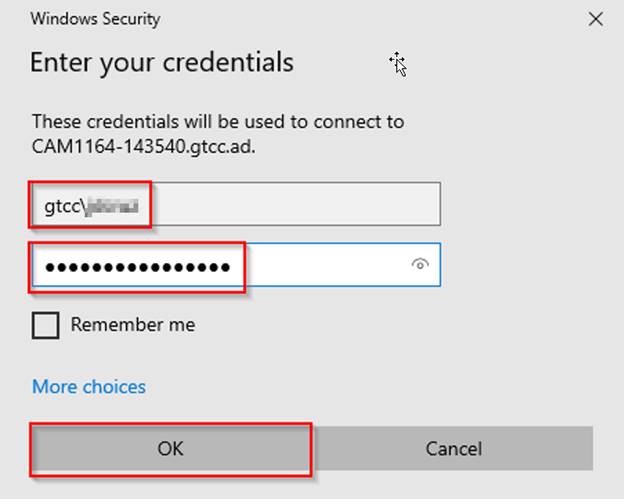
10.
You will be prompted to enter you GTCC credentials.
Remember to add gtcc\ before your
username, then click OK.
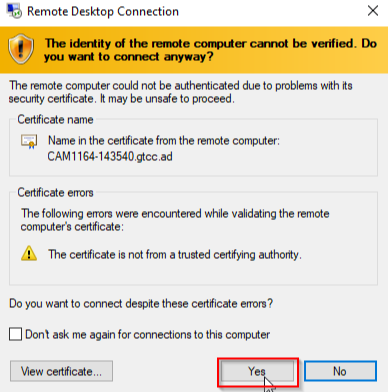
11.
If you get a message about the identity or
certificate of the remote computer, click Yes.
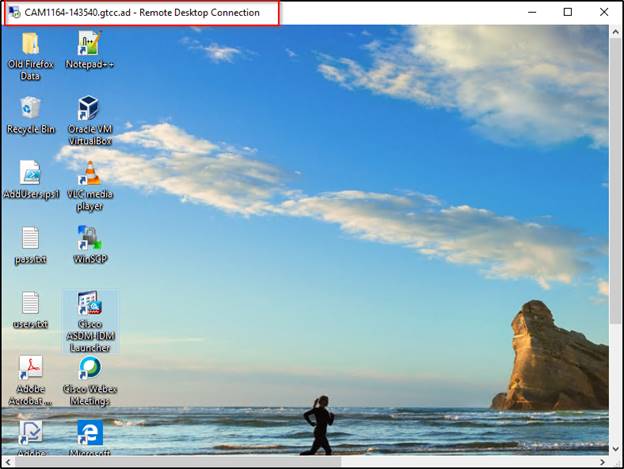
12.
You are now connected to your office computer. You
will have a new window that looks like your office computer. When working from
this window, you will have the same access you have when working on your office
computer.
13.
You know you are working on your remote computer if
the window title has your computer name :

Using Microsoft Teams
You will be
able to work productively from your remote location by using Microsoft Teams.
If you are
working remotely on a GTCC device, Teams may already be installed.
·
To start Teams in Windows, click Start > Microsoft
Teams.
·
To start Teams on a Mac, go to the Applications
folder and click Microsoft Teams.
·
To start Teams on a mobile device, tap the Teams
icon.
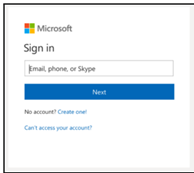
If Teams is
not installed on your GTCC computer, or if you are working on a personal
device, you will need to open Teams from the internet. Go to https://teams.microsoft.com and sign in
with your GTCC e-mail address and password.
Once you log
in, you will see your team. If you need to create an additional Team, submit a
request to the ITS Service Desk.
You can use
Teams to:
·
Schedule and attend meetings
·
Share documents
·
Conduct chats/conversations
·
Communicate through audio and video calls using your
computer’s microphone and speakers or a headset.
For additional
information and instructions on using Teams and other applications:
Microsoft
Teams End User Training
Getting
Started with Remote Learning
Remote
Teaching and Learning in Office 365
How
Schools Can Ramp Up Remote Learning Programs with Teams
Remote Voicemail Access
Procedures
You can access
your voicemail services even when you are away from your GTCC location. The
following procedures explain how to:
·
Dial in to your GTCC voicemail account from a remote
location.
·
Forward your voicemail service to another phone
number.
Dial in to your GTCC voicemail account from a remote
location:
1.
Dial the campus phone number: 336.334.4822.
2.
Press * during the recording.
3.
At the prompt, enter your ID number (your phone extension)
followed by #.
4.
At the prompt, enter your PIN followed by #.
5.
You are now able to access your messages.
Forward your voicemail service to another phone
number:
1.
Go to myphone.gtcc.edu.
2.
Depending on your web browser, you may receive a
website security certificate. Click the Continue to webpage link.
3.
Sign in with your GTCC username (minus @gtcc.edu) and
your password.
4.
Use the Call Forwarding prompt, and enter the
forwarding number.
If the forwarding number has a 336 area code, enter 9 before the number (e.g.,
9-336-1234567). If the number is outside the 336 area code, enter a 9 and a 1
before the number (e.g., 9-1-123-456789).